Quick Start Guide - Modbus Gateway
In this tutorial, we will show you the functions of the Ozeki Modbus Gateway. We will talk about communicating with a Digital Humidity and Temperature (DHT) sensor device, an electricity meter device, a Modbus relay device and how to talk with other devices on the Modbus (such as PLCs, IO modules, etc) using with HEX messages. This is a step-by-step guide with lot's of screenshots, so it will be easy for you to follow and understand it. There is a thorough video explanation on all the topics. Let’s start with the Modbus DHT sensor device.
How to chat with a Modbus DHT device
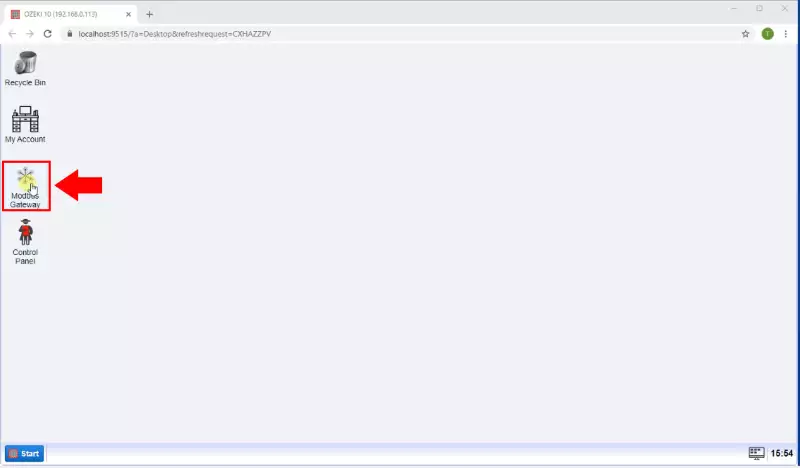
To start communicating with the DHT device, you need to launch the Modbus Gateway. The icon for it is located on the desktop of the Ozeki 10 and titled “Modbus Gateway”, as you can see on Figure 1. To open the application, click on the icon.
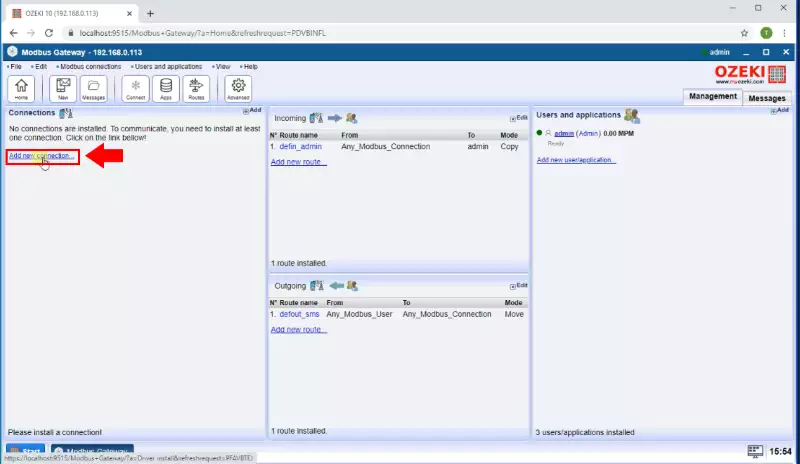
The first thing you will se when you open the gateway is the home screen of it. To operate a device through the application, you need to add a new connection first. To do that, you need to click on the “Add new connection” button on the left side of the screen, as it is shown on Figure 2.
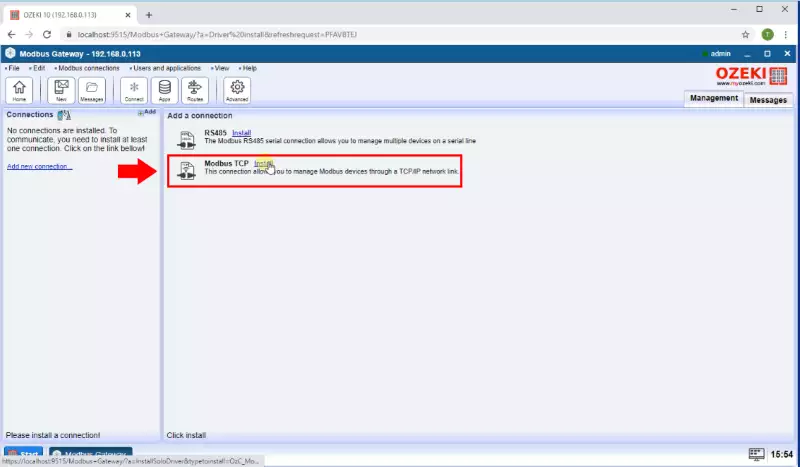
To operate a DHT device, you will need a Modbus TCP connection. This connection will allow you to manage Modbus devices through a TCP or an IP network link. To setup this kind of a connection, you need to click on the blue “Install” button next to the Modbus TCP connection title, as it can be seen on Figure 3.
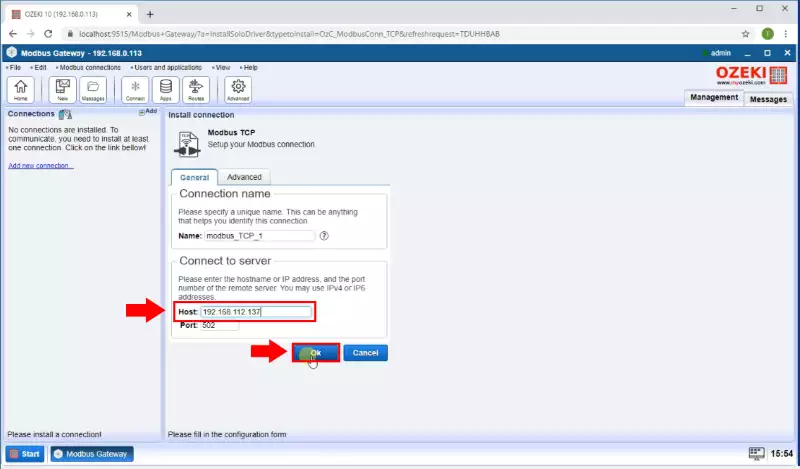
You need to setup a Modbus connection to make it work properly. To do that, you will need the hostname or IP address and the port number of the remote server. Type them in the adequate field in the “Connect to server” panel. You can find it in Figure 4.
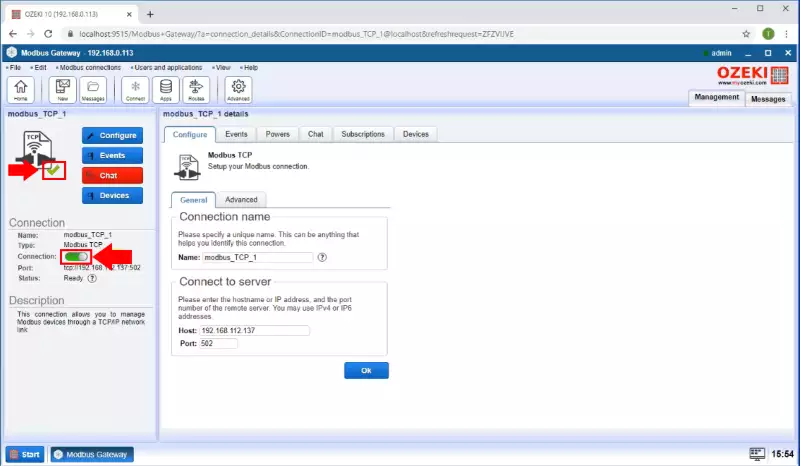
After you configured the connection, you will need to manually enable it, by switching an option on the left side of the screen, titled: “Connection”. You will find it with the help of Figure 5.
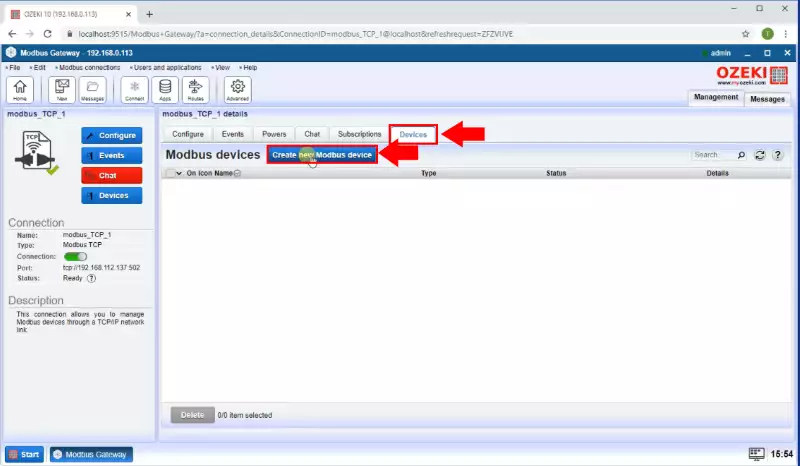
To create the device which you will be communicating with, you will need to head over to the device panel, located within the selectable panels on the top of the main working area of the window gateway window. Figure 6 will help you find it.
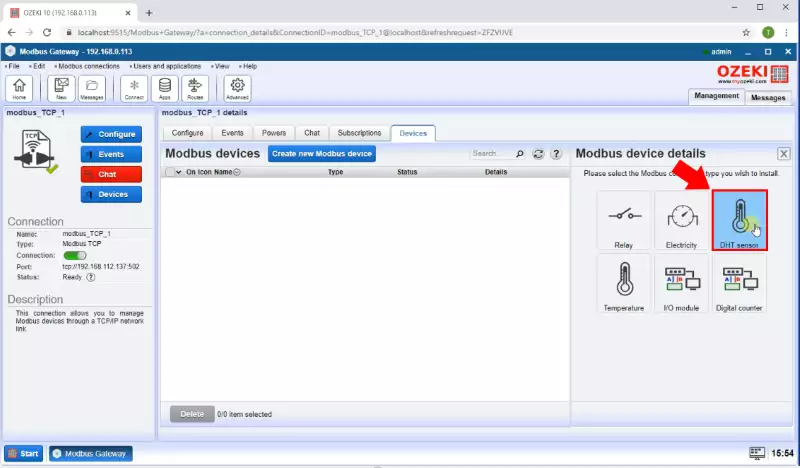
Next up, you need to choose the DHT sensor device from the multiple devices that you can operate with the Modbus Gateway. You can choose it on the right side of the window, as it is show on Figure 7.
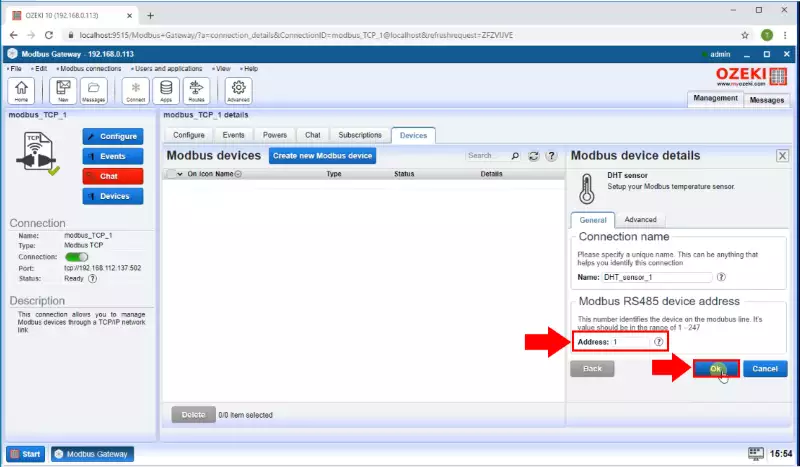
Now in this panel on the right side of the window, as shown on Figure 8, you will need to set the details of the Modbus device. The “Connection name” will serve as a help of spotting the connection inside the Modbus Gateway application. The “Device address” will identify the device on the Modbus line. This should be in the range of 1 – 247.
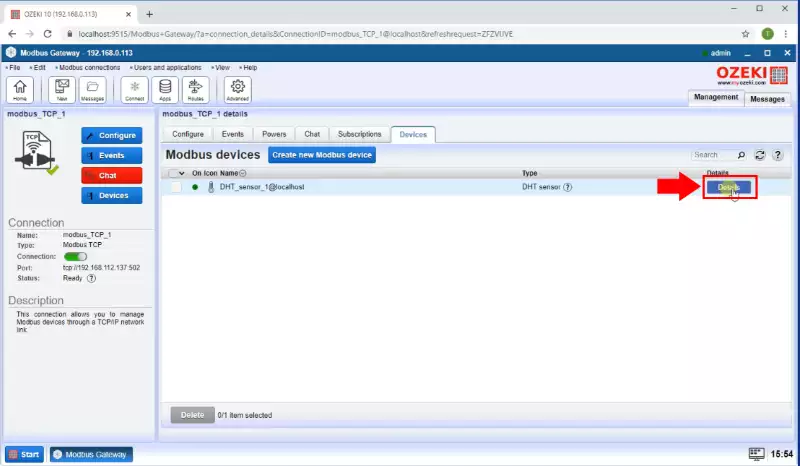
To modify anything in the settings of the DHT sensor, you will need to open the device details panel. To do this, you need to click the “Details” button next to the name of the connection you wish to modify. You can find it easily with the help of Figure 9.
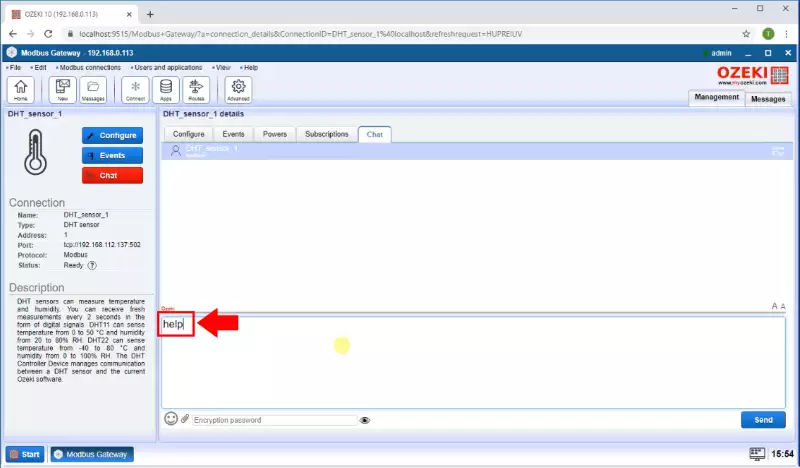
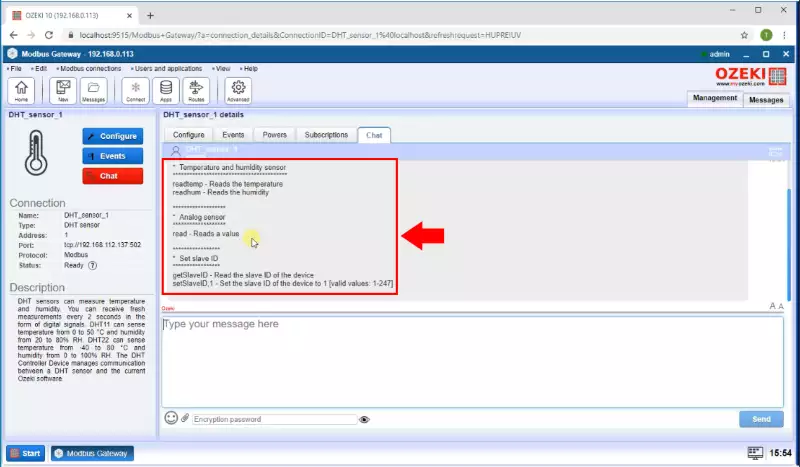
If you send the “help” message, the device will send back a list of every command you can use to operate the DHT sensor, and some details about each command. You can see it in Figure 11.
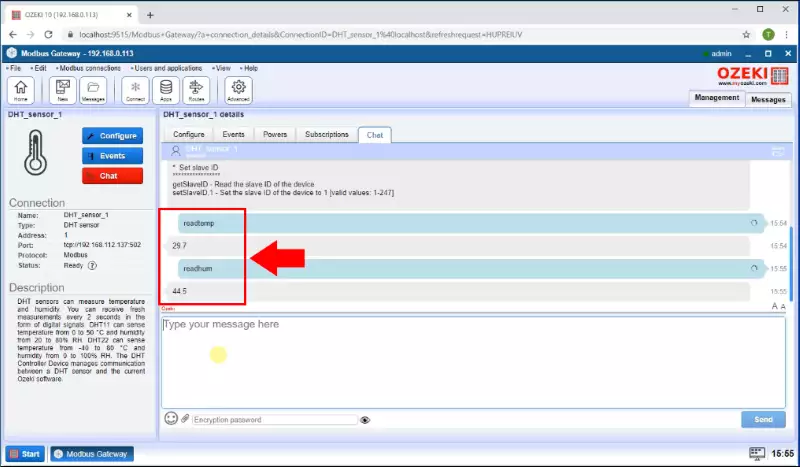
To use these commands, all you need to do is to type them in the bottom of the chat panel and hit the “send” button. You will see a demonstration on Figure 12.
How to chat with Modbus Electricity meter device
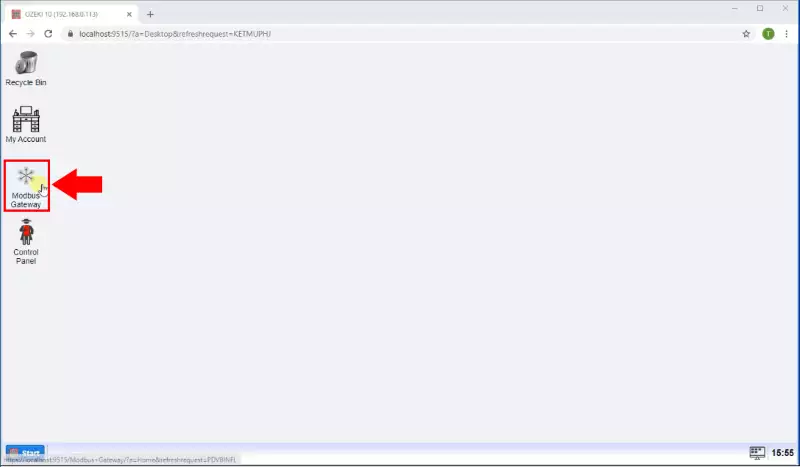
To start configuring your Modbus Electricity meter device, you need to open the Modbus Gateway application. To do that, you need to click the icon of the program on the desktop of Ozeki 10. You will find it easily with the help of Figure 13.
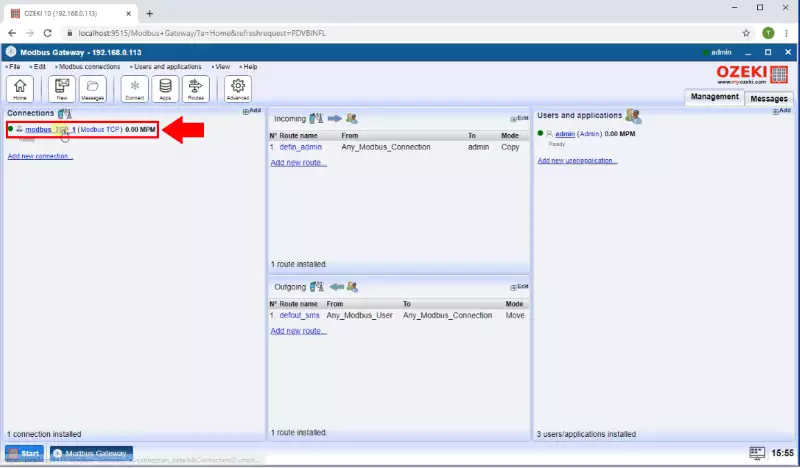
To create your new device, open the Modbus TCP connection which we already configured. You can do this by clicking at the name of the connection on the left side of the screen, as you can see on Figure 14.
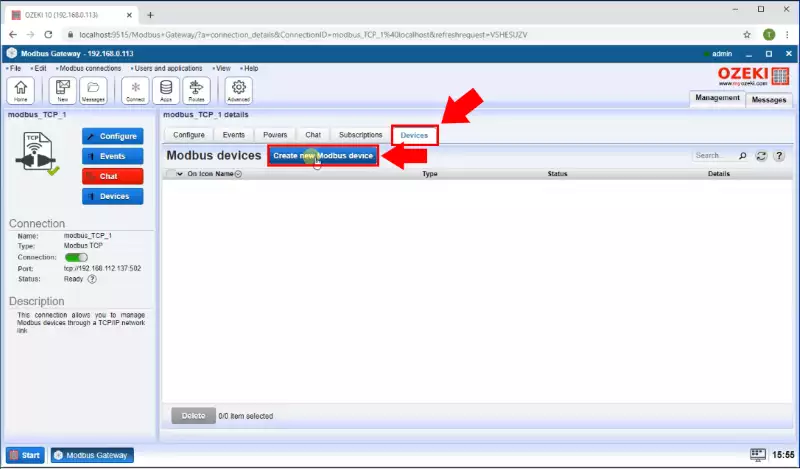
Now you can create your new Modbus device by clicking on the “device” tab and then the “Create new Modbus device” button. You can find them with the help of Figure 15.
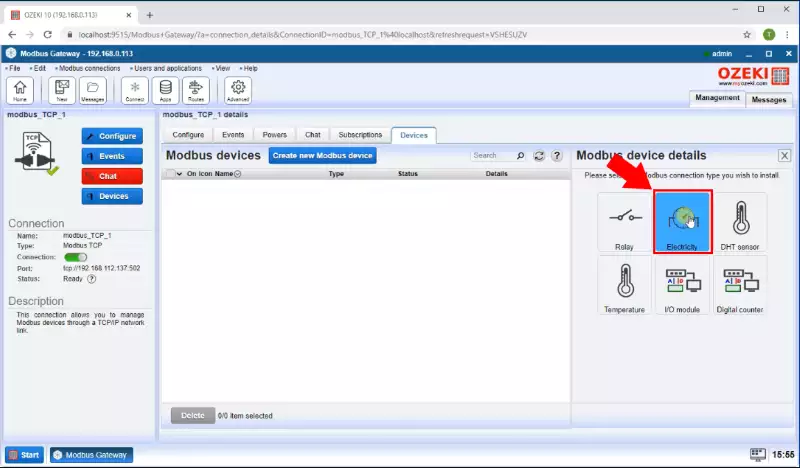
Now you can create the electricity sensor which you will communicate with. To setup the device, click in the button which says “electricity”, on the right side of the screen as shown on Figure 16.
After you have created, you will need to set the device details. You must choose a name for your device which can be anything you like, and a device address which will identify the device on the Modbus line. The value should be in the range of 1-247. You can find it on Figure 17.
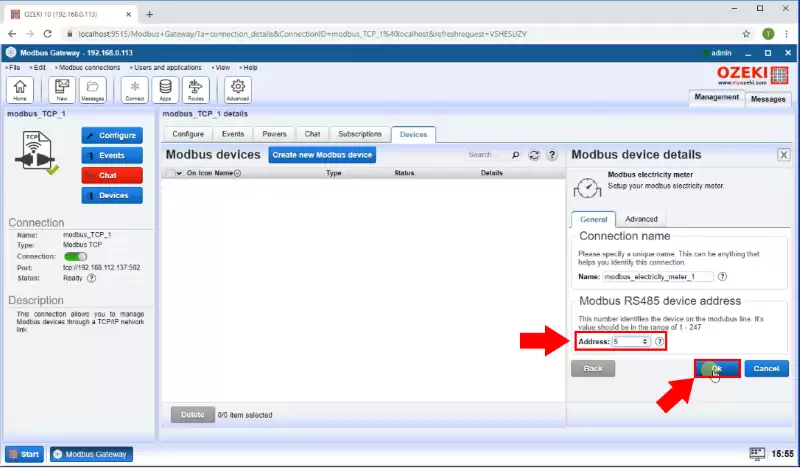
Next up, you need to open the device details tab, by clicking the “details” button on the right side of the screen next to the name of your device, as you can see on Figure 18.
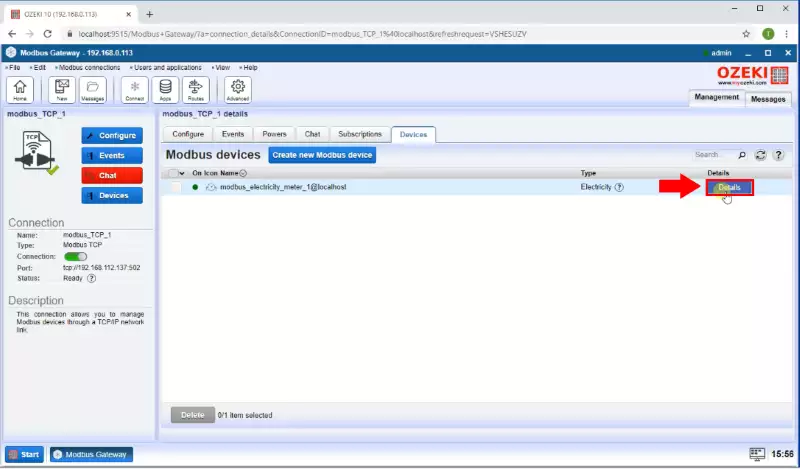
If you want to know more about the commands you could use with your device, you could send the “help” message to the device as you can see in Figure 19.
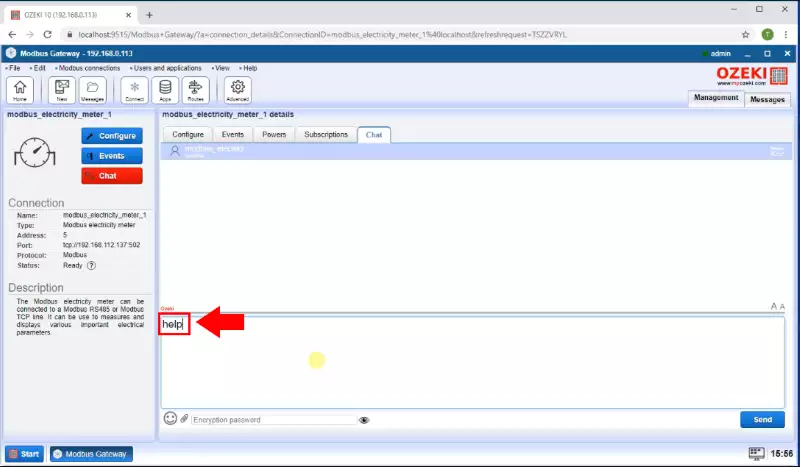
It will send back all the info you need to know about the commands that your device accepts and understands, as it is represented in Figure 20.
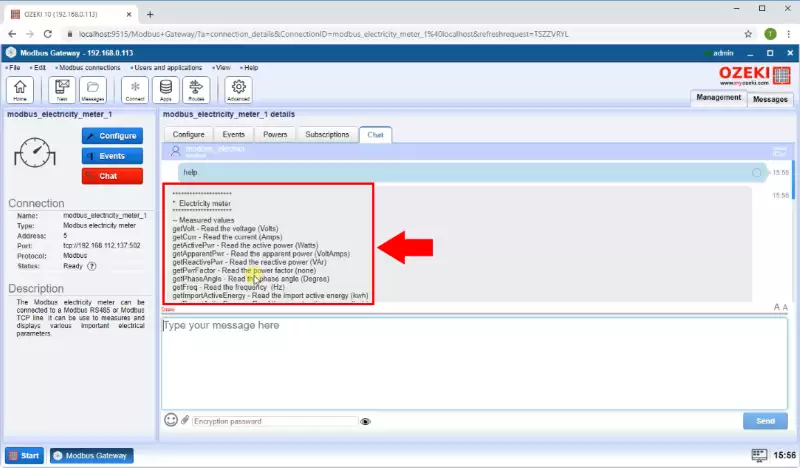
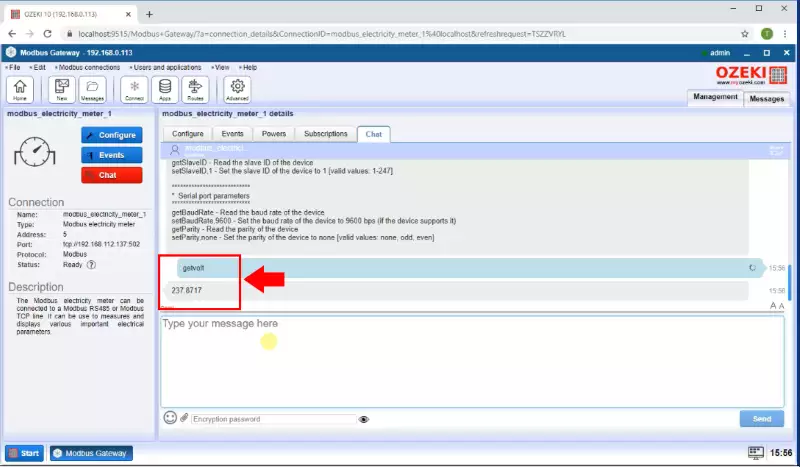
To operate the device, you need to send commands in the “chat” panel by typing them and clicking send. The device will send back the data you asked for as in Figure 21.
How to chat with Modbus Relay device
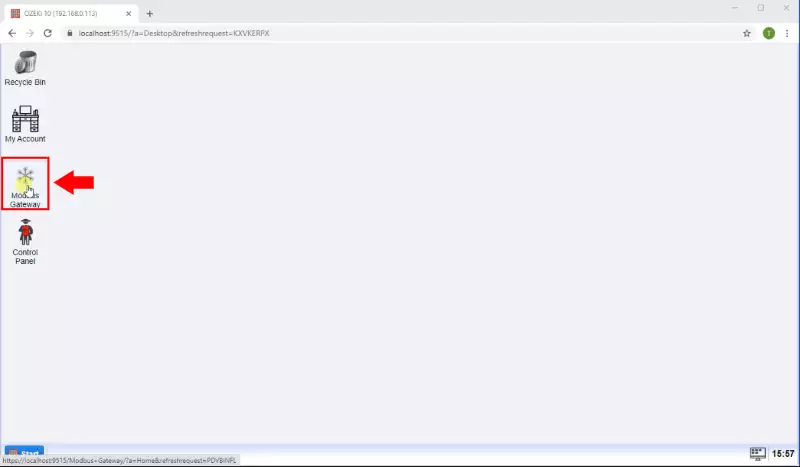
To chat with a Modbus Relay device, first you will need to open the Modbus Getaway application. You can find it on the Ozeki 10 desktop. You will need to search for an icon called “Modbus Getaway”. You will find it easily on Figure 22.
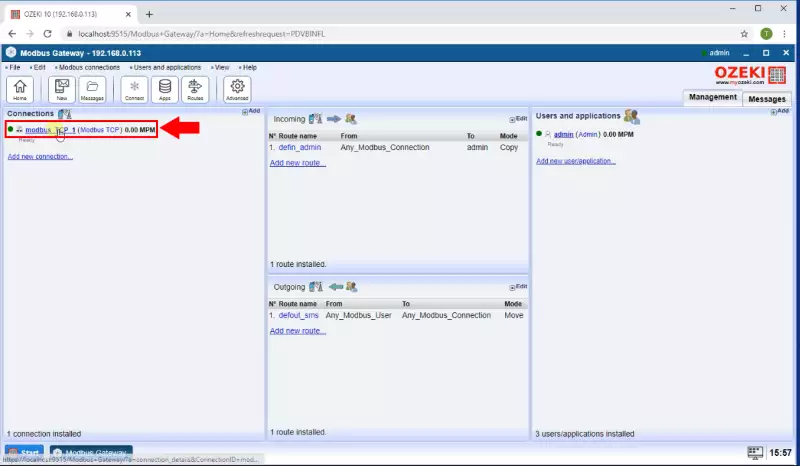
Next up, you need to open the Modbus TCP connection tab, by clicking the name of the connection which you already configured. You will find the button you will need to click on Figure 23
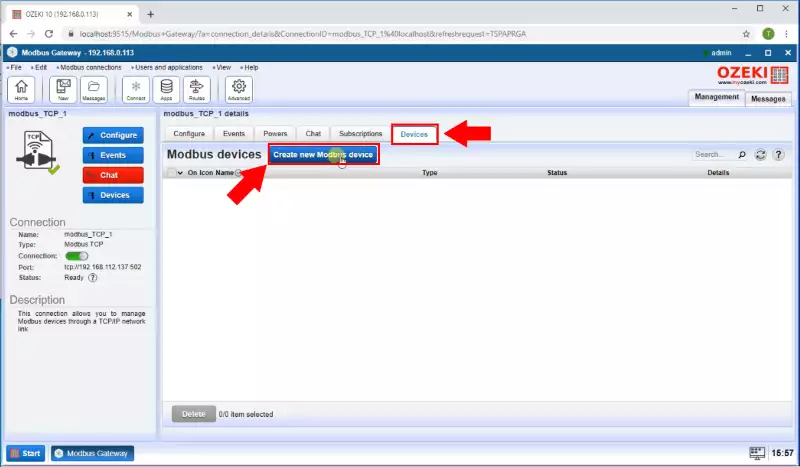
Here, you have to head over to the “Devices” tab and click the “Create new Modbus device” button. It is located next to the “Modbus devices” title, as it is shown on Figure 24.
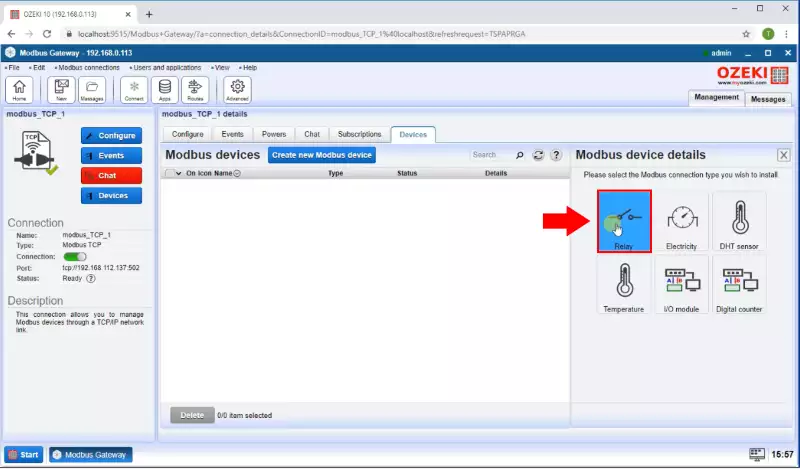
Now you need to choose the “Relay” from the six different Modbus connection types. To do that, just click on the button saying “Relay” as demonstrated on Figure 25.
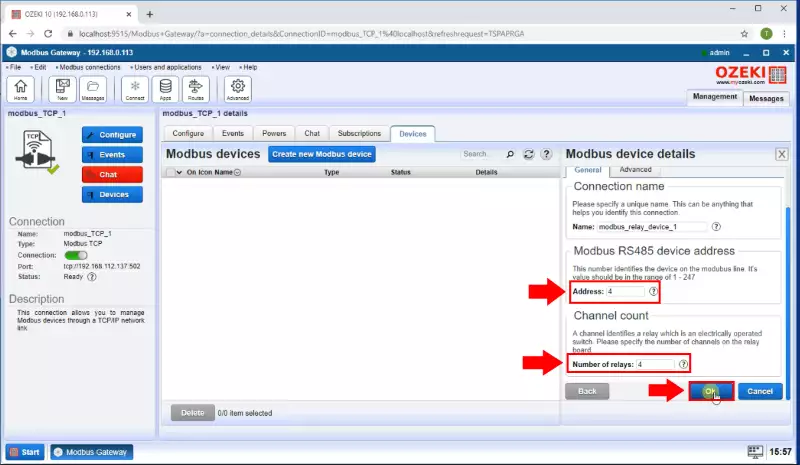
After it, you must set you device details in the right side of the screen. You will need a connection name, which can be whatever you want, a device address which will identify the device on the Modbus line and it should be in the range of 1-247 and a channel count which must be the number of channels on the relay board. You can see it on Figure 26.
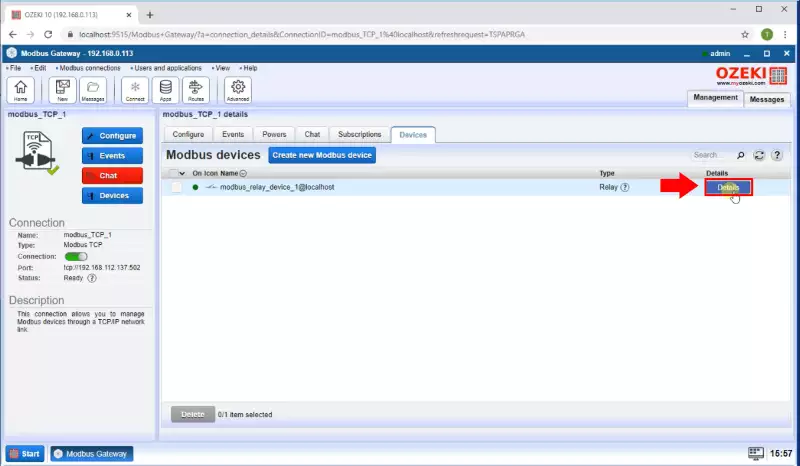
To communicate with your device, you must open the device details tab. To do that, you need to click on the “Details” button next to the name of your device as it is shown on Figure 27.
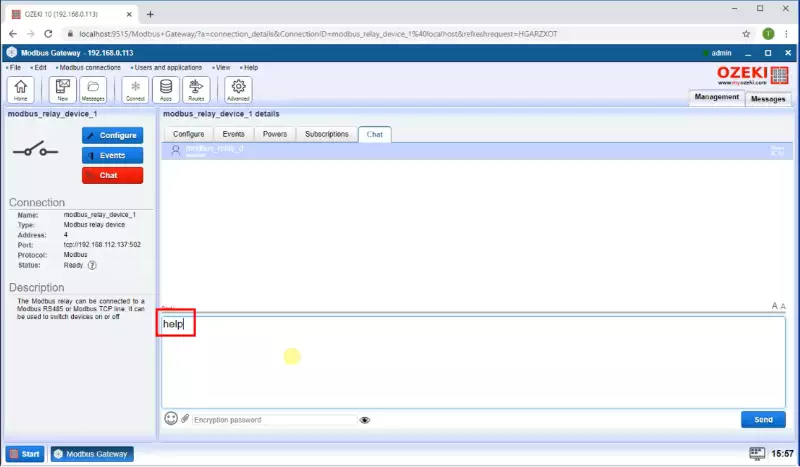
To learn about the commands that you can use to operate your device, just send a “help” message to it. To do it, just type in “help” and click send, as it is shown on Figure 28.
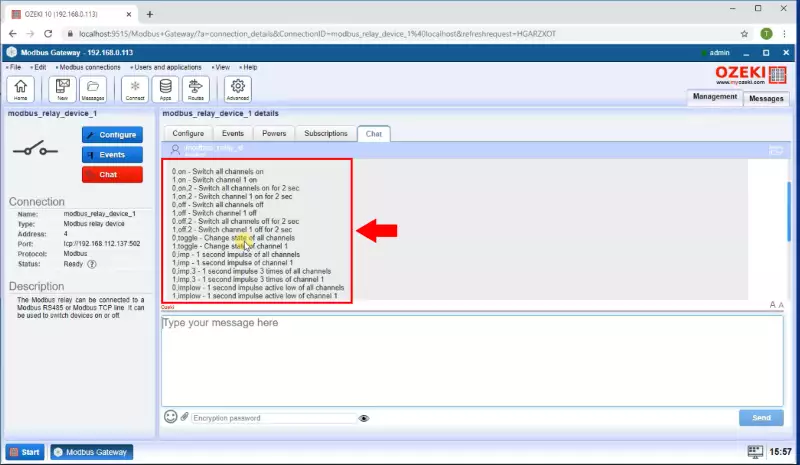
You will receive a message from your device with all of the usable commands. You can use those to operate the device in order to your preferences. You can read all the commands in Figure 29.
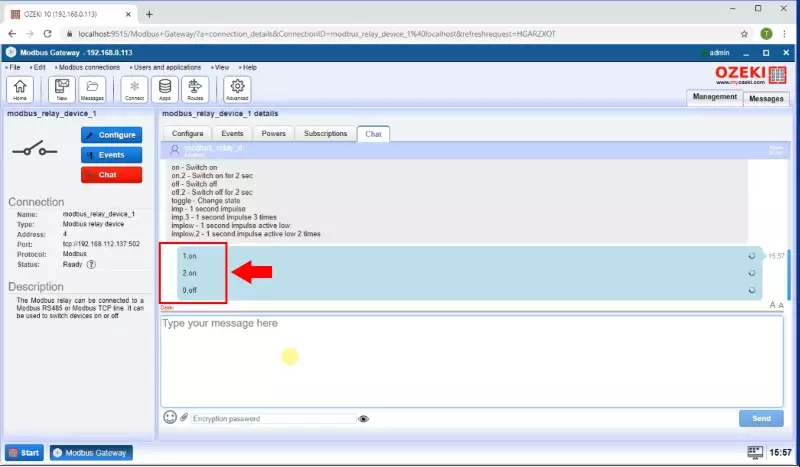
As you can see in Figure 30, if you type in any of the commands and send them to the device, it will read them and behave the way you need it to.
How to chat with Modbus device by HEX messages
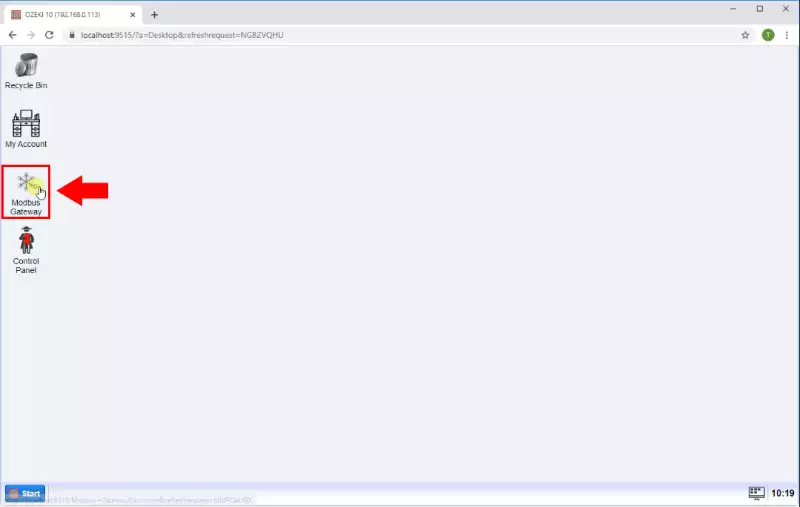
To chat with a Modbus device by HEX, or hexadecimal format, first you will need to open the Modbus Getaway application. You can find it on the Ozeki 10 desktop. You will need to search for an icon called “Modbus Getaway”. You will find it easily on Figure 31.
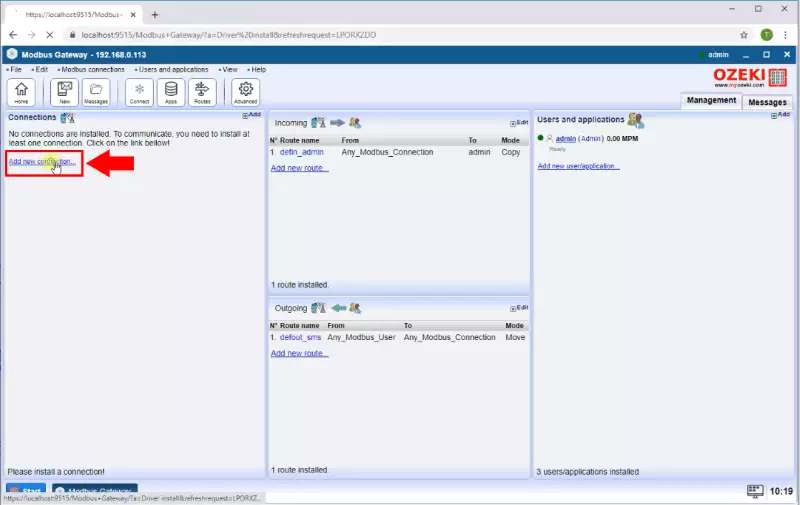
The first thing you will see when you open the gateway is the home screen of it. To operate a device through the application, you need to add a new connection first. To do that, you need to click on the “Add new connection” button on the left side of the screen, as it is shown on Figure 32.
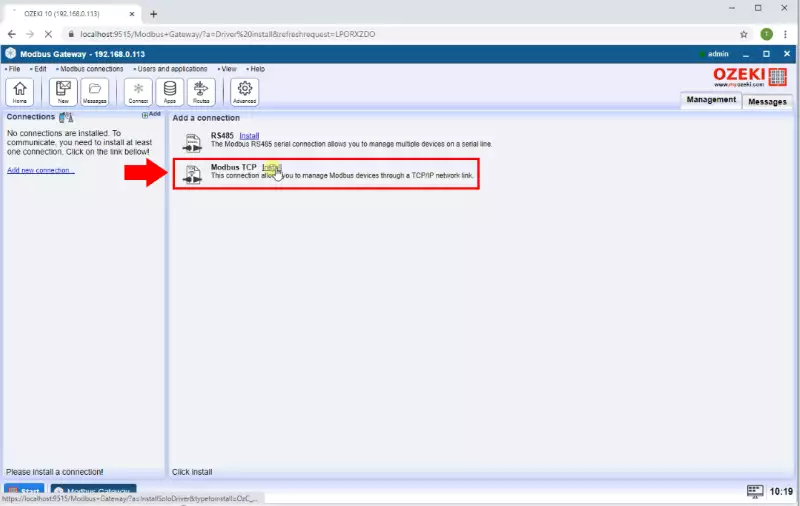
To chat with a Modbus device by HEX, you will need a Modbus TCP connection. This connection will allow you to manage Modbus devices through a TCP or an IP network link. To setup this kind of a connection, you need to click on the blue “Install” button next to the Modbus TCP connection title, as it can be seen on Figure 33.
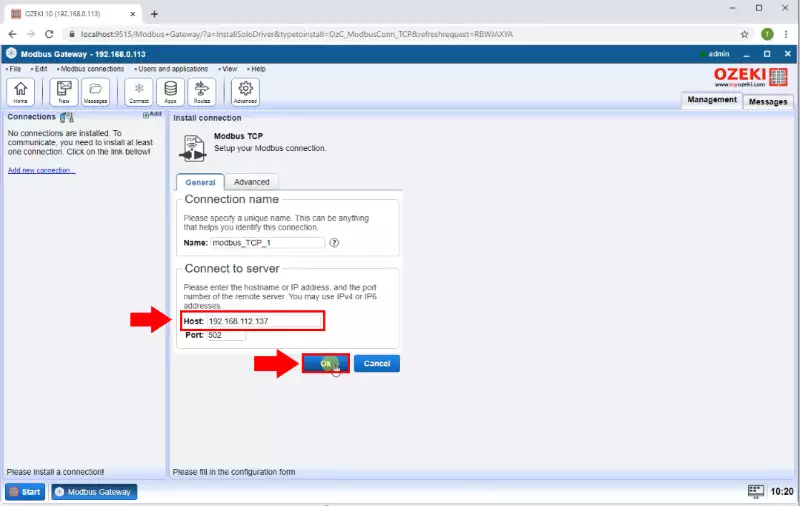
You need to setup a Modbus connection to make it work properly. To do that, you will need the hostname or IP address and the port number of the remote server. Type them in the adequate field in the “Connect to server” panel. You can find it in Figure 34.
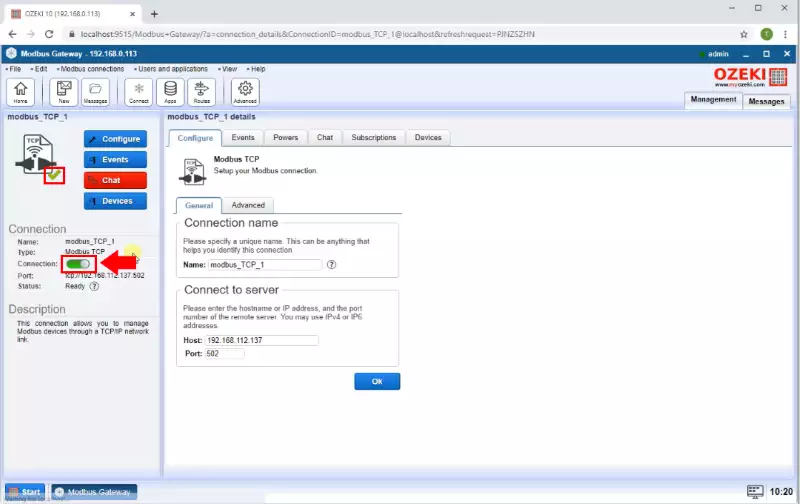
After you configured the connection, you will need to manually enable it, by switching an option on the left side of the screen, titled: “Connection”. You will find it with the help of Figure 35.
Now you can start chatting with the device using hexadecimal codes. To do this, you need to head over to the chat tab on the top of the main working area, as you can see on Figure 36, and type in your HEX message.
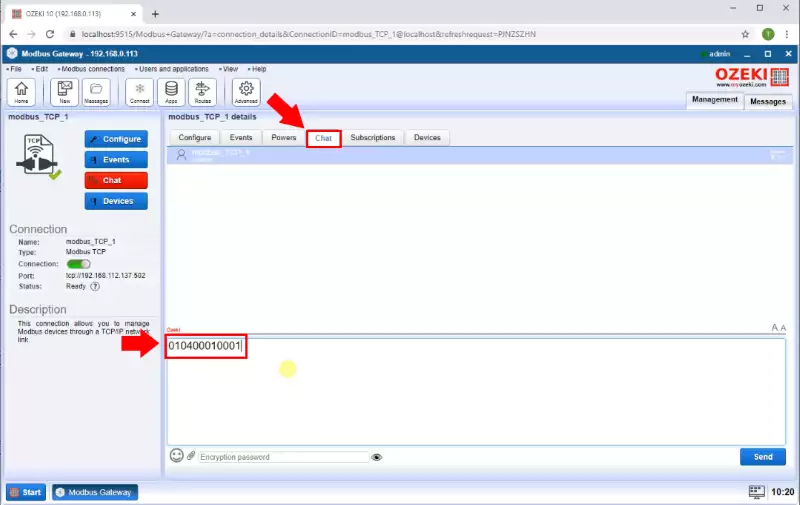
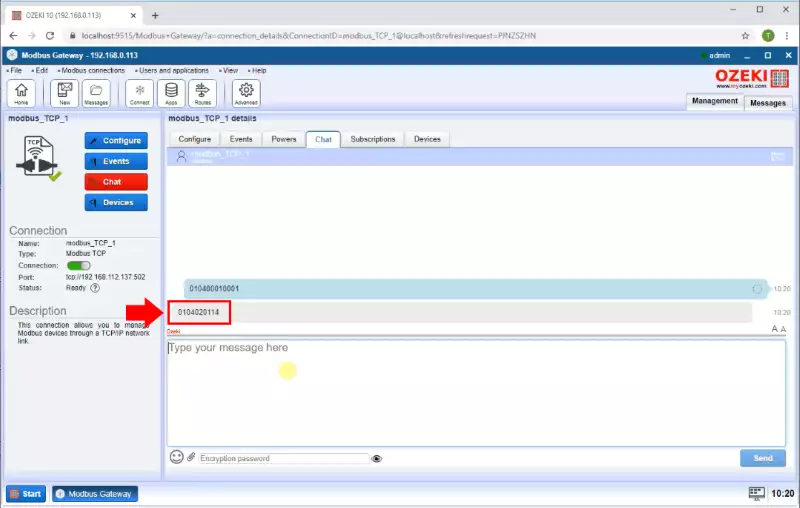
As it is shown on Figure 37, the machine will understand de hexadecimal code and answer it with a hexadecimal code as well.
We hope that you have managed to follow the tutorial. If you have any problem with any of the steps, feel free to contact us at info@ozeki.hu.

 Sign in