How to install Ozeki Modbus Gateway
In this tutorial, we will present you a step-by-step guide on how to install Ozeki Modbus Gateway on your computer. It is a very easy procedure; you need no computer skills to perform the steps of the installation. You will only need a computer and internet access to install the Ozeki Modbus Gateway, and to use it as intended. The tutorial is also including a detailed video guide, which can be watched below. Let’s start!
Step 1 - Download the required files
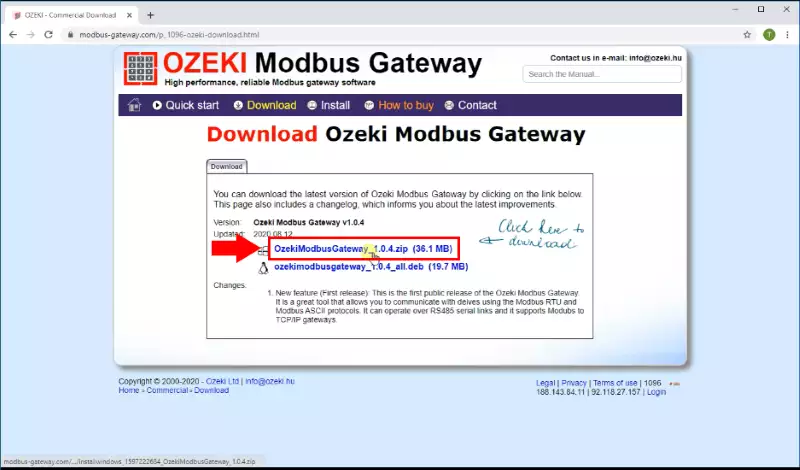
The first step of the installation is to download the required files, which can be later used to install the program to your computer. The “Download Ozeki Modbus Gateway” page contains the download links to both windows and Linux version of the program, as you can see on Figure 1.
Step 2 – Install the software on your computer
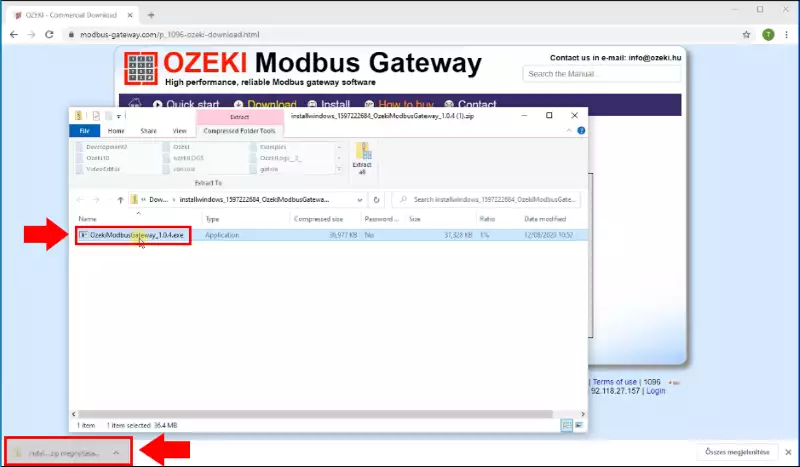
When you have successfully downloaded the Ozeki Modbus Gateway installer, you can start the installation process by clicking on the “OzekiModbusGateway” executive file, which you just downloaded, as it can be seen on Figure 2.
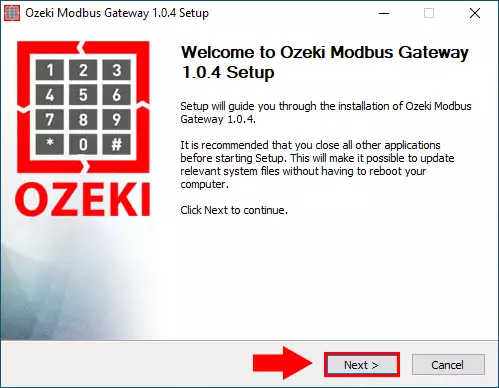
On Figure 3, you can see the welcome page of the Ozeki Modbus Gateway setup program. This will pop up after you opened the setup executive file. All you need to do to progress in the installation process, is to click on the “Next >” button.
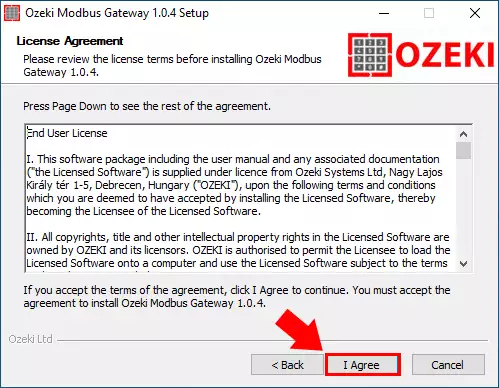
On the next page of the installer, you will be learning about the License Agreement of our software. If you want to move further with the installation, you will have to agree the agreement, by clicking the “I Agree” button, as it is presented on Figure 4.
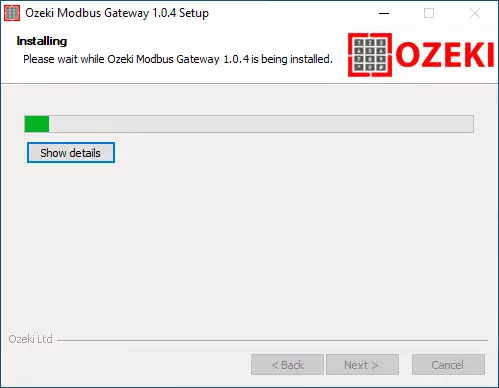
On the next window, you will watch the setup program installing your software on the computer. You will have to wait out the setup process to proceed. The setup process is visualized with a progression bar, as can be seen in Figure 5.
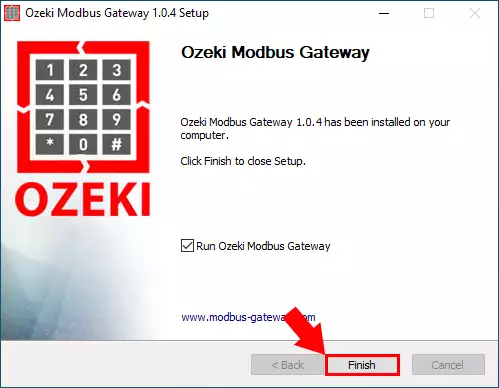
When the installer finishes the process, you will see a finish window, like on Figure 6. This means that your software was installed without a problem, and you should have a working software now. To open the Ozeki Modbus Gateway and close the installer, you need to tick in the “Run Ozeki Modbus Gateway” option and click the “Finish” button.
Step 3 – Configure the Ozeki Modbus Gateway
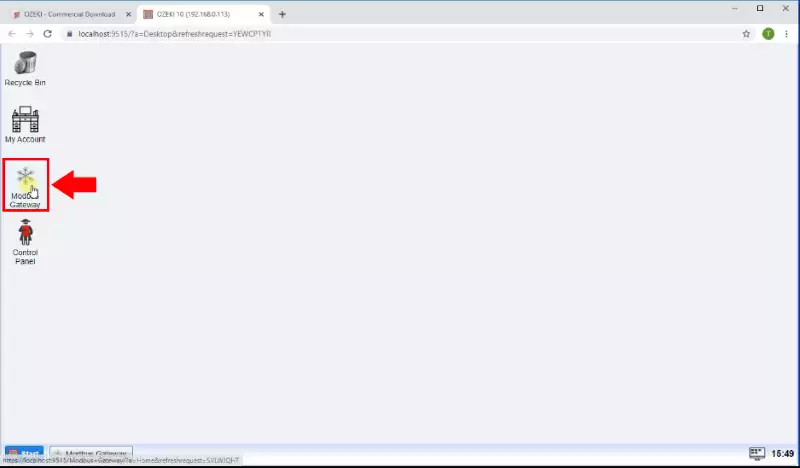
To start configuring the gateway, you need to open the Modbus Gateway app. You can find the icon of the program on the Ozeki 10 desktop, titled "Modbus Gateway”. Click on it to launch the application.
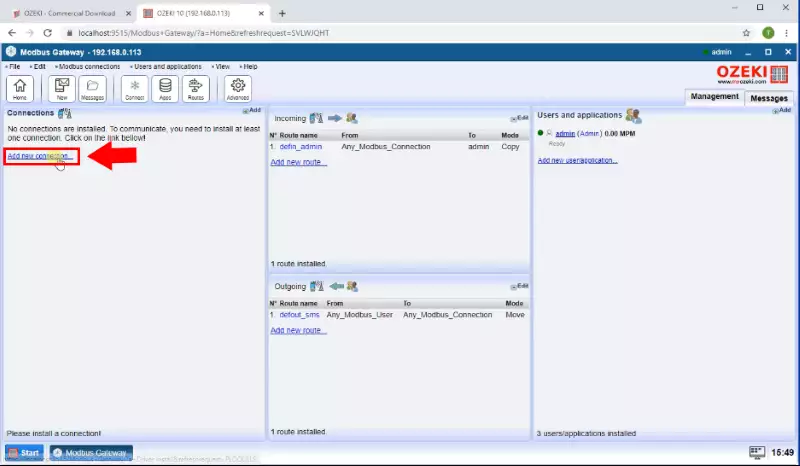
To communicate in any way in the Modbus Gateway, you need to install connections. To do that, you need to click the “Add new connection” button on the upper left side of the homepage of the Modbus Gateway. On Figure 8, you can see the options which you need to click.
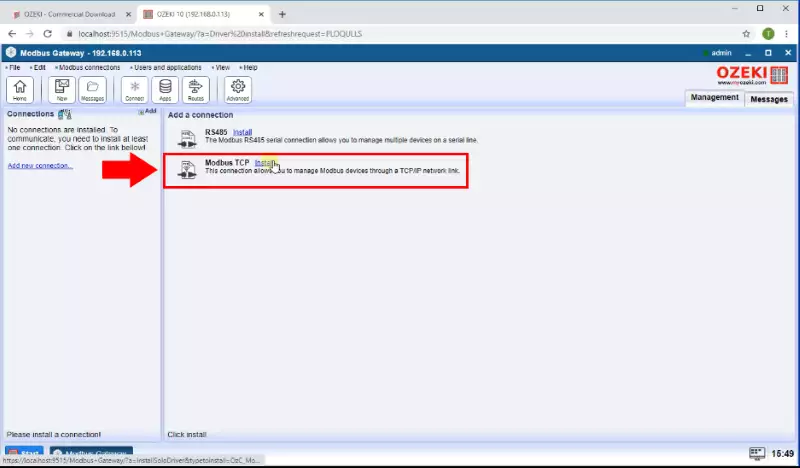
Here, you will be presented with two options to choose from as seen on Figure 9. To install a TCP connection, you need to choose the Modbus TCP option. Click on the “Install” button to proceed.
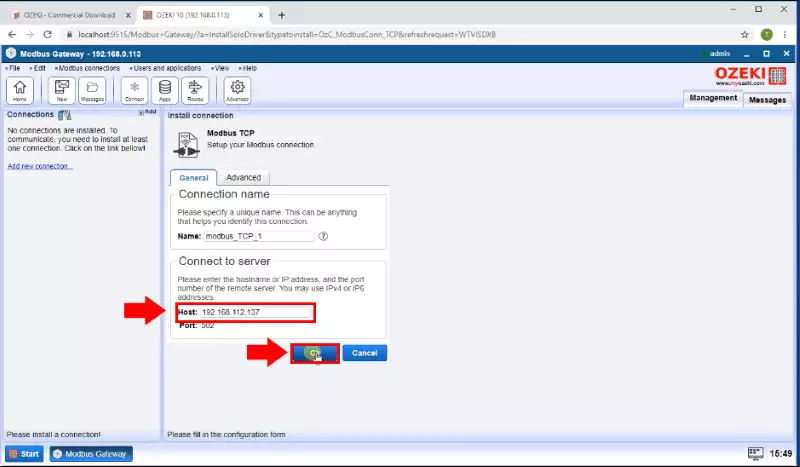
To connect to a remote server, you need to enter the IP address, and the port number of the server here in the “Connect to server” panel, as demonstrated at Figure 10. We use an example address and port number here.
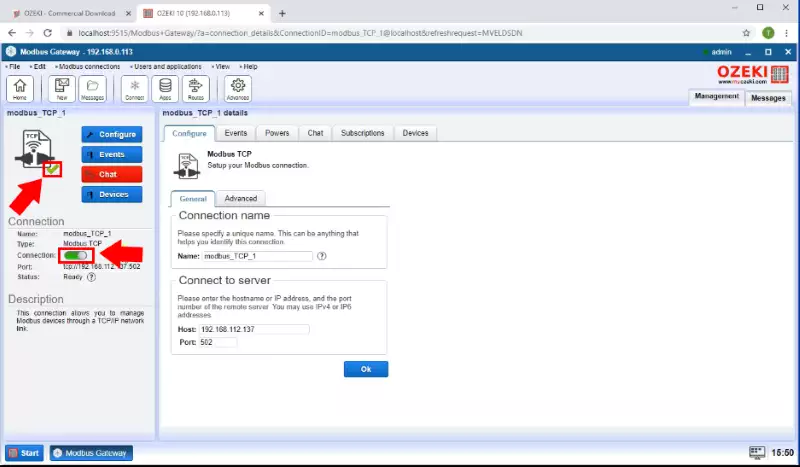
If you want the Modbus connection to work properly, you need to manually enable the connection. You can do this on the left side panel as indicated on Figure 11. Just switch the “Connection” option on, and the Modbus connection will work as intended.
Step 4 - Create a new device
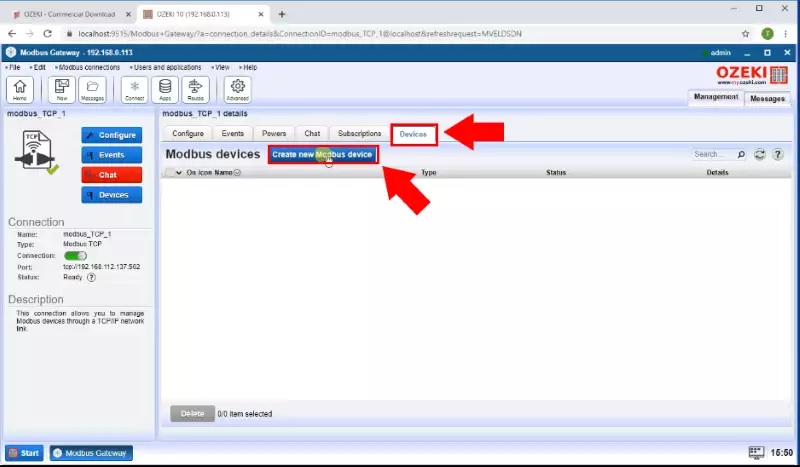
To add a new Modbus device, you need to go to the “Devices” panel by selecting it from the tabs on the top of the main section of the Modbus Gateway window, as can be seen on Figure 12. Here you need to click the blue button under the tabs, which says “Create new Modbus device”
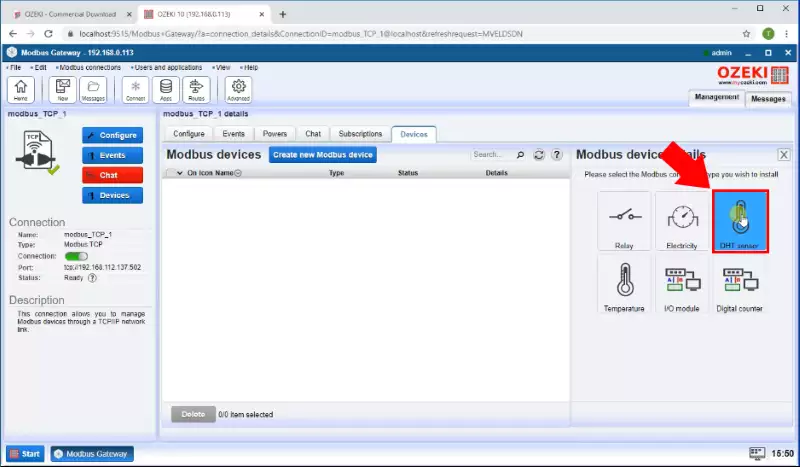
From the many options here, you can choose to setup a new DHT sensor. In this tutorial, we will continue with it. You need to click the “DHT sensor” button to install a new device as you will se on Figure 13.
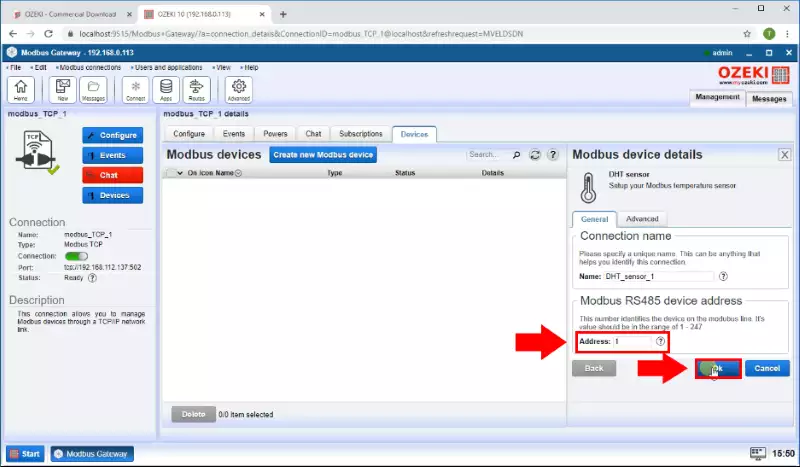
Now in this panel on the right side of the window, as shown on Figure 14, you will need to set the details of the Modbus device. The “Connection name” will serve as a help of spotting the connection inside the Modbus Gateway application. The “Device address” will identify the device on the Modbus line. This should be in the range of 1 – 247.
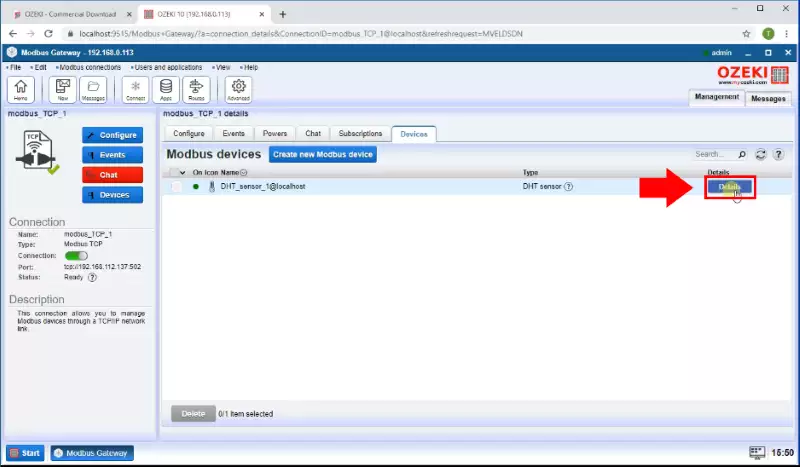
To modify anything in the settings of the DHT sensor, you will need to open the device details panel. To do this, you need to click the “Details” button next to the name of the connection you wish to modify. You can find it easily with the help of Figure 15.
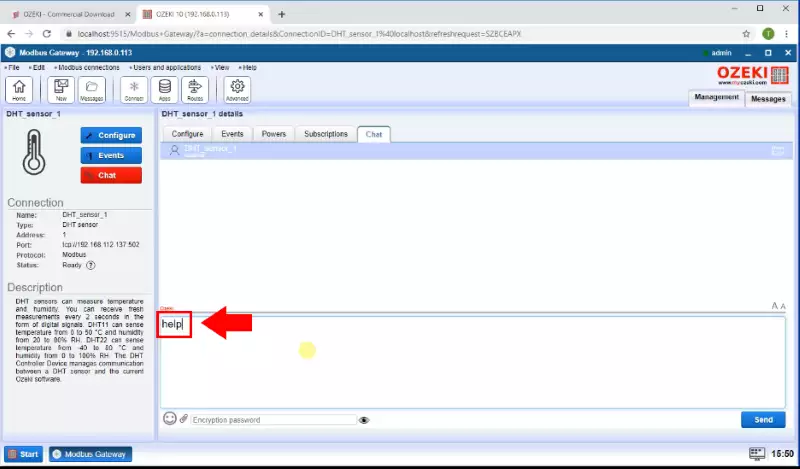
To get more information about the working of your device, send a message which only contains the word “help”. To do this, you need to go to the "chat" panel which is on the top of the main panel. You can find it easily on Figure 16.
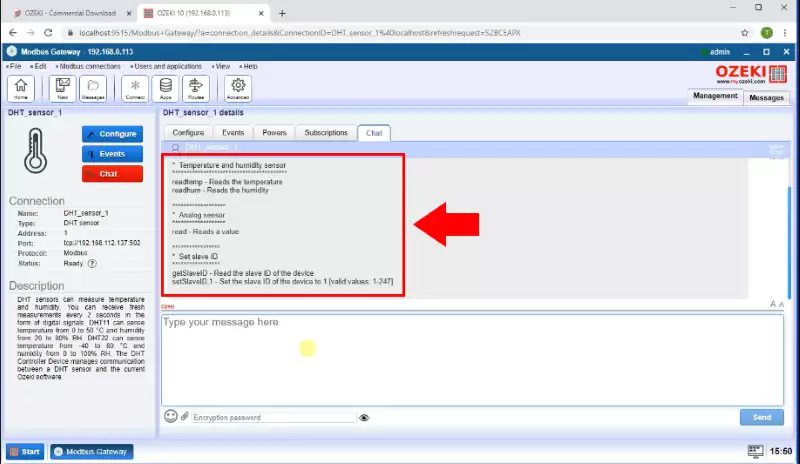
If you send the “help” message, the device will send back a list of every command you can use to operate the DHT sensor, and some details about each command. You can see it in Figure 17.
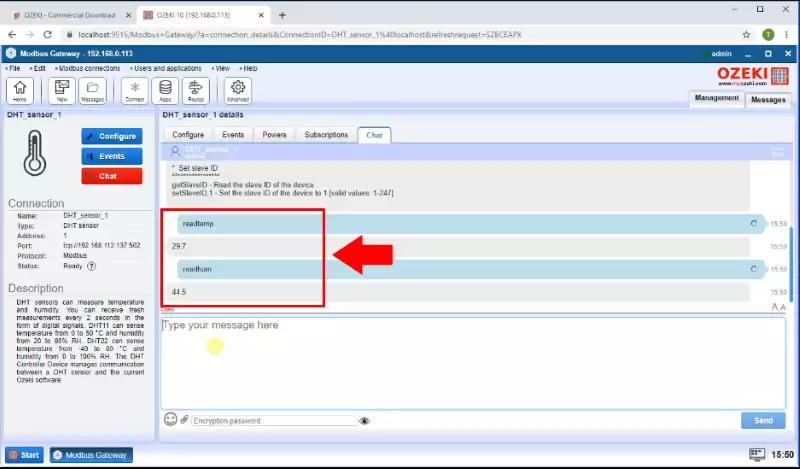
To use these commands, all you need to do is to type them in the bottom of the chat panel and hit the “send” button. You will see a demonstration on Figure 18.
We hope that you have successfully installed,and will be able to operate the Ozeki Modbus Gateway program. If you have any problem with any of the steps, feel free to contact us at info@ozeki.hu.

 Sign in